Remove spot with Spot Healing Brush Tool
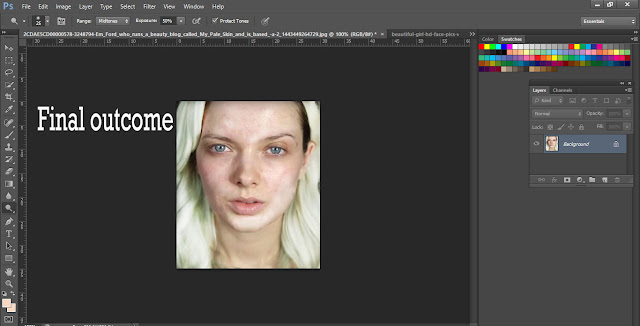
The output of tutorial is displayed for you-
Now we start our process in the below-
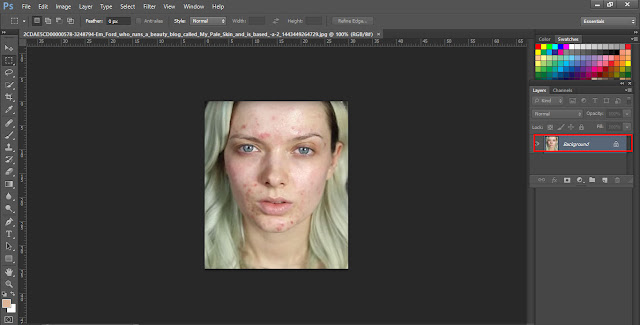
Step 1: We have one layer, the background layer, which holds the image need to edit
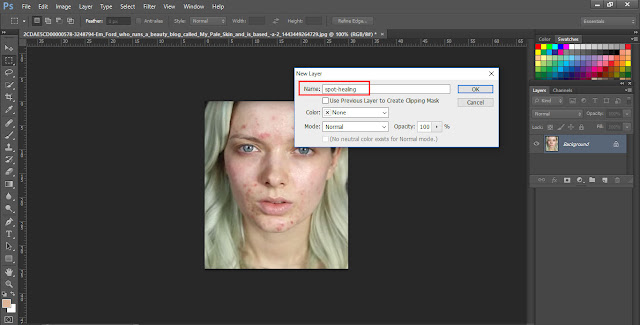
Step 2: We need to protect the original portrait though we have to make the photo look better. To add a new blank layer above the background layer. We will do us all edit and spot healing work on this separate layer. Press ALT + NEW LATER icon at the bottom of layer panel.
Step 3: After pressing ALT + NEW LATER icon a popup box will appear which name the new layer before it’s added
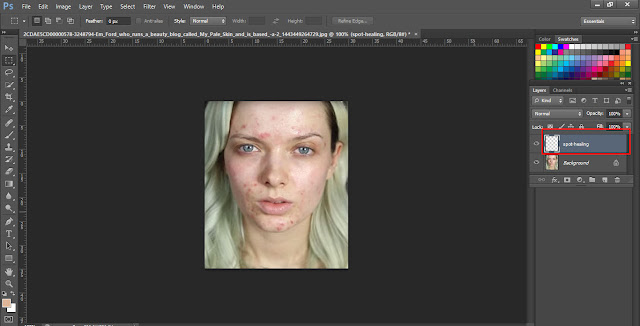
Step 4: If we see again layer panel, we can see the spot healing layer sitting above the image
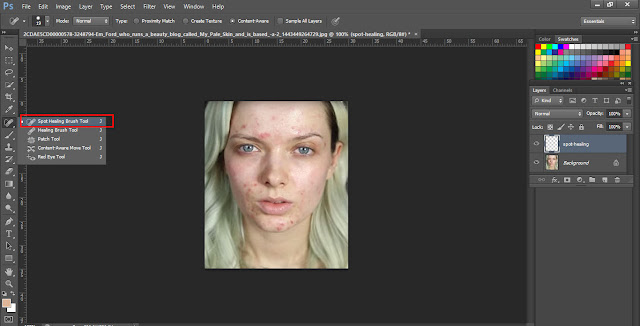
Step 5: Select spot healing brush tool from the tool panel
Step 6: We need to tell Photoshop to look at the image in the background layer. That’s why select “sample all layers “option in the options bar along top of the menu bar
Step 7: To make more intelligent decisions when choosing good replacement texture with problem texture. We need to make sure type option set “content-aware” by default
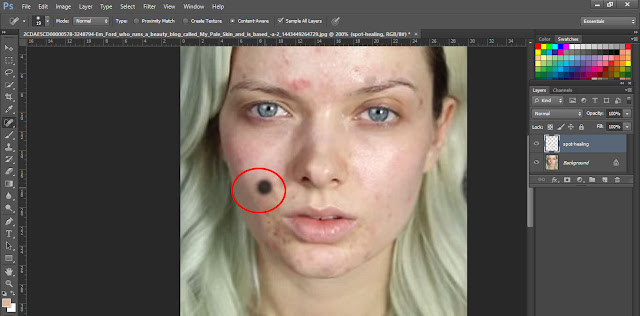
Step 8: Now click the problem area with the spot healing brush tool to fix them. Zoom area with a problem to see the spot more clearly. Remember to make brush size larger than the problematic area by clicking right bracket
Step 9: Click on the pimple with healing brush just like previously so all the spots can replace with surrounded area
Step 10: Every time clicking again it shows a different result. So click repeatedly in the pimples by moving brush over them and adjusting its size with left and right bracket keys
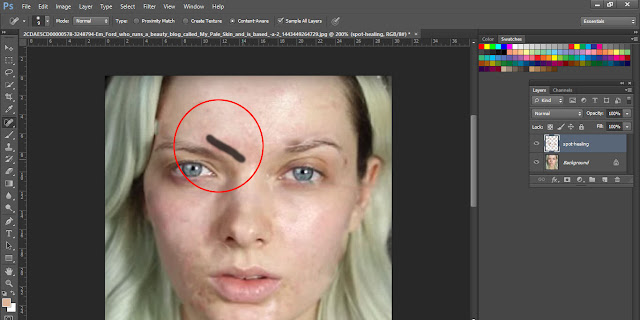
Step 11: If there is larger spot on the skin try to fix it with smaller sections with the brush tool and click and drag in short strokes. As you drag your brush across the spot area it will appear black. Release your mouse button and instantly heals area with surrounding texture
Step 12: Then continue to click and drag process to heal all the simple and strong blemishes on the skin
After just a couple of minute’s worth of efforts, Photoshop was able to do a pretty impressive job with Photoshop tools
If you miss our previous tutorial about hair color changing you can go and visit HERE
Thanks for visiting our tutorial
Here is our another BLOG








It's really wonderful to check out and extremely interesting. A lot many thanks for the sharing. I was searching for that and also this is extremely crucial for me. Many thanks!
ReplyDeleteBest Regards,
images retouches