Photoshop Photo manipulation With Layer Mask
In computer graphics, graphics software refers to a program or compilation of program that facilitates a person to influence images or model visually on a PC.
Photo manipulation involves transform or changing a photo using a variety of method and techniques to attain preferred results. There are a number of software applications accessible for digital picture manipulation, range from professional application to very fundamental imaging software for informal user
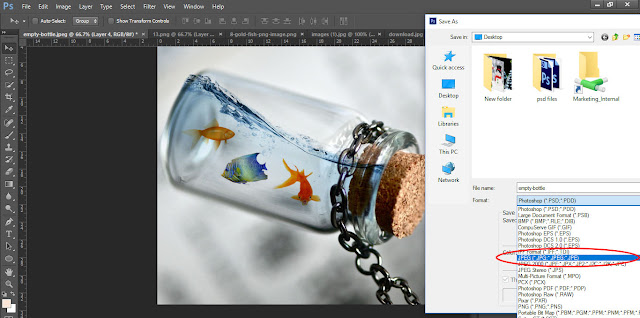
The manipulation we are today trying to create is like this view-
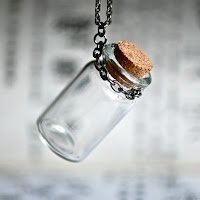
Here are the photos I am working with. Notice all the backgrounds so well that you can understand it perfectly.
Now here we start manipulation-
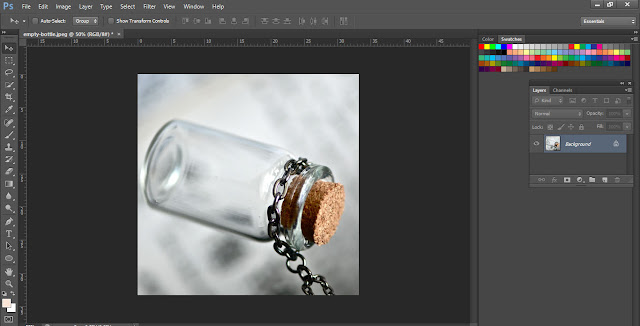
Step 1: Open Image which we want to use as a first background
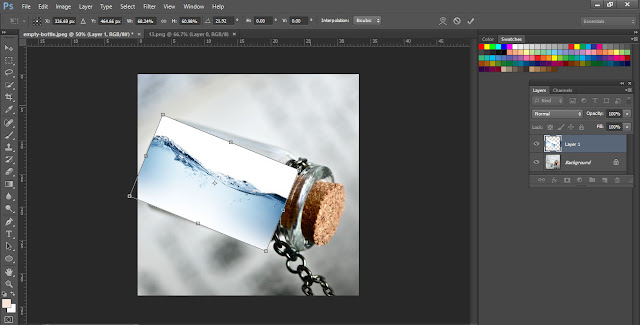
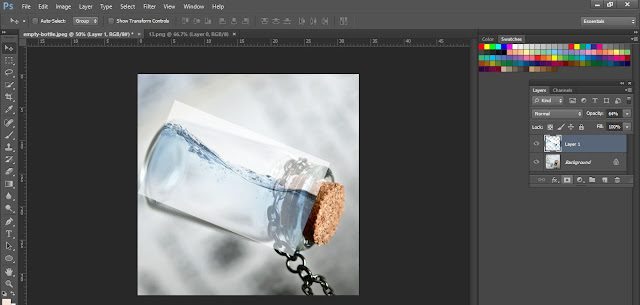
Step 2: Then again an open image which is the second image. We want to place above the previous background
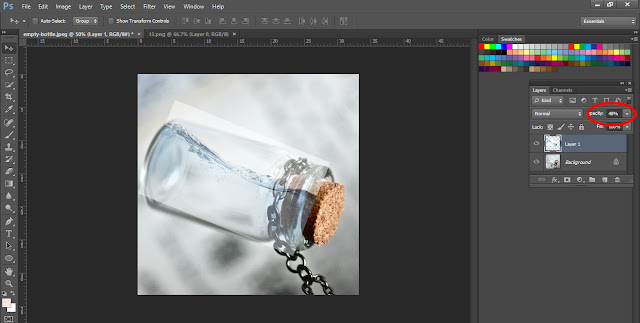
Step 3: Minimize its opacity to correct placing on the background
Step 4: Resize the image for perfect placing
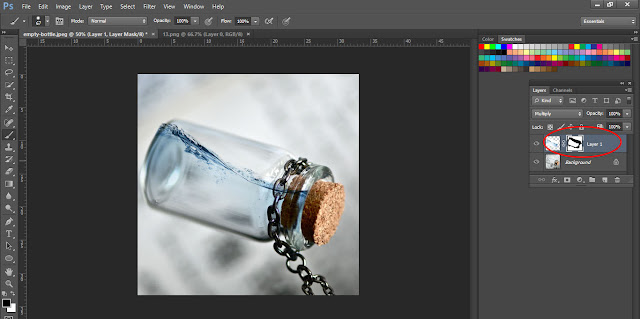
Step 5: Click on add layer icon bottom of layer panel selecting second image background
Step 6: Select brush tool and layer icon as layer panel choose black as foreground color and white as background color by default to brush the unwanted area of the second image from the main background to make an illusion
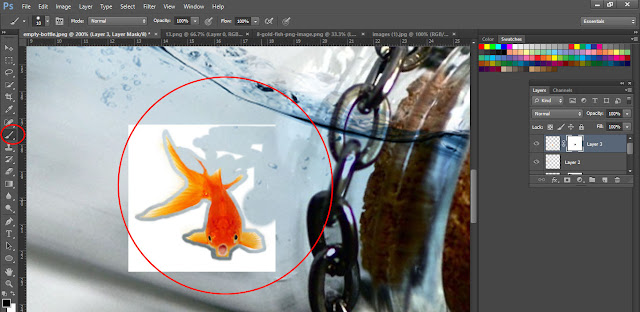
Step 7: same way take a fish image and place it on the second image to look like they are all together on the empty bottle. Same click on add layer icon and brush the unwanted area surrounded by the fish so they look like fish between the water
Step 8: Take another fish image for more natural illusion
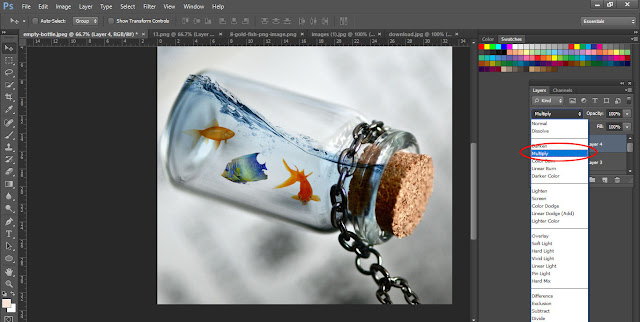
Step 9: After applying all the fishes on the water it looks something silly that they are so much color on the water. It should have look dull and dam or colorless on the water
So for making all the fish’s dull and colorless select type as “multiply “after placing and masking
Step 10: Now you can evaluate the final outlook of this entire manipulation illusion
Thanks for reading our tutorial
For the previous tutorial enjoy the full tutorial HERE







Post a Comment