Change Skin Tone with Photoshop
Image Adjustment Techniques. is to modify skin color from dark to fair or fair to dark.If we go "Adjustments" under the Photoshop Image menu, we can find few more tools for changing skin tone.

First create a duplicate layer of your photo and use a selection tool to select the skin. Then, use the Brightness/Contrast options to lighten or darken the skin.
Here we are going to apply the whole process of changing skin tone with photoshop
Step 1: open image on the Photoshop

Step 2: Select spot healing brush and heal the extra spots if exist
Step 3: Add new layer and select brush tool with soften and increase hardness about to 10%

Step 4: Choose white color to paste the brush on the dark ares of the skin


Step 5: Then changing blending option to soft light

Step 7: Select new layer and click on add layer mask

Step 8: Bring back the original color of the eye and eyebrows

Step 9: Select layer 1 and go to hue/adjustment layer to selective color


Step 10: Box will appear; choose white by default and adjust cyan , magenta , yellow and black together

Step 11: Select 3 layers on the layer panel and merge it together

Step 12: Select merge layer and duplicate the layer
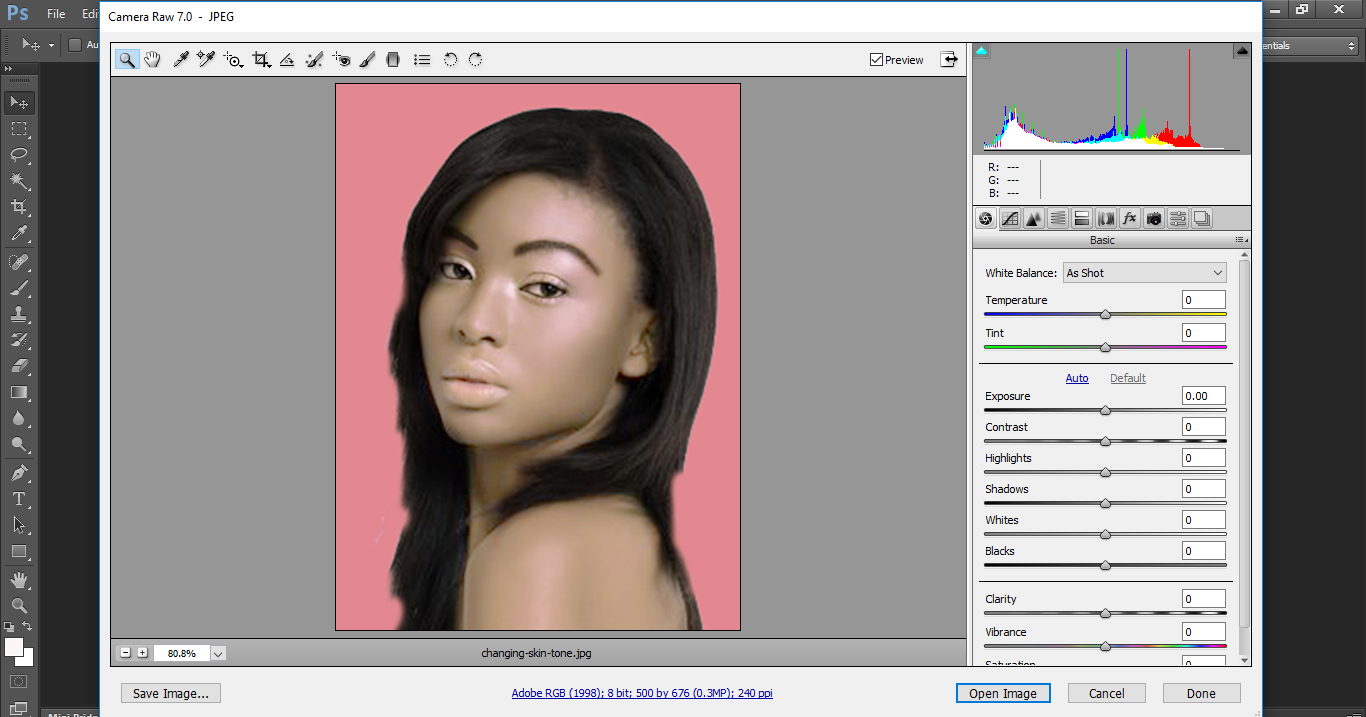
Step 13: Select image and open camera raw filter to adjust the skin color more perfectly

Step 14: Open basic function and increase temperature and tint ; keep moving vibrance to see the correct adjustment

Step 15: Choose detail and move luminance to might to make the color more glazy

Step 16: Go to split toning and increase hue to brightness skin

Step 17: Again layer mask the eye area of inside to bring back the original color

Step 18: Select brush and dodge tool ; change its opacity to low . change range to midtones

Step 19: Brush on the face area of the skin on the definite area to make the natural highlight

Step 20: Choose burn tool and change its exposure to 4% and retouch with it on the highlighted areas

Step 21: Add new layer on the layer panel and paste the red color on the lips

Step 22: Change blending option into multiply

Step 23: Decrease the opacity level of this layer

Thanks for visiting our tutorial
You can find out more photo editing blogs HERE


Laser Skin Hair Removal is the best solution I found. I found it when I got sick of trying the temporary skin hair removal methods. 除毛
ReplyDeleteThis is really great photo editing tutorial. Thanks for your clear direction.
ReplyDeleteSuch image editing is now possible with GIMP. It is not only widely considered the best free photo editor available on the market but it has power to replace photoshop also. The software includes a wide range of tools, ranging from basic actions to professional-quality features. Beginners will highly benefit from its selection and montage tools, cropping, color adjustment, and automatic image enhancement tools. On the other hand, advanced users will find a number of tools catered to them, such as content-aware resizing, face swap, animated GIFss, layer masks, curves, and personalizable brushes.
ReplyDeleteHow much should I pay for product photography?
ReplyDeleteBest Regards,
Clipping Path Company
Photoshop Photo Editing >>>>> Download Now
ReplyDelete>>>>> Download Full
Photoshop Photo Editing >>>>> Download LINK
>>>>> Download Now
Photoshop Photo Editing >>>>> Download Full
>>>>> Download LINK s7
So effective blog and nice tutorial.
ReplyDeleteBackground removal service
Thanks for this post. To change the skin colour or photo retouching is quite an important thing in photoshop. Your guide is really helpful and worth following. Keep up the good work.
ReplyDeleteI can't thank you enough for this fantastic tutorial on retouching skin in Photoshop Achieving that professional look in portrait photography can be a real challenge, and this guide is an absolute treasure trove of information for photographers and retouching enthusiasts.
ReplyDeleteThe step-by-step breakdown of the process, from basic clean-up to advanced techniques, is truly invaluable. It's clear that a lot of thought and expertise went into creating this tutorial. I appreciate the attention to detail and the emphasis on maintaining the subject's natural appearance while enhancing their features.
Great tips on changing skin tones! For those looking to elevate their photo editing game, I highly recommend checking out the incredible photo retouching services available at Graphic Experts India!
ReplyDeleteYour blog always feels like a safe space to explore new ideas. Thank you for creating that.
ReplyDeleteVisit Here: Old Photo Restoration Service