site stats
Photoshop Photo Editing | Image Retouching | Background Remove | CutOut: clipping mask
Showing posts with label clipping mask. Show all posts

How to place the image in a shape with Photoshop clipping mask

July 30, 2018


In this tutorial, you will learn how to place the image in a shape with Photoshop by clipping mask. As you can see, Photoshop makes it simple to put a photo into any kind of shape, from a fundamental rectangle or round shape to a fancy custom shape.


For this tutorial, I am using one of Photoshop’s ready-made custom shapes. But once you’ve learned clipping mask process to follow the steps, you can start inserting pictures into any shape you like!

Want to know about details of clipping mask?

Visit Our Page


How to place an image in the text with Photoshop clipping mask

July 16, 2018


A very popular result to generate and one that also happens to be very simple to do gratitude to the influence of Photoshop’s clipping masks, as you can able to see from today’s tutorial.


In this tutorial, you can learn how to place an image in the text with Photoshop clipping mask

Want to know more about tutorials?? Visit Here 

How to clipping mask with Adobe Illustrator & Photoshop

February 01, 2018


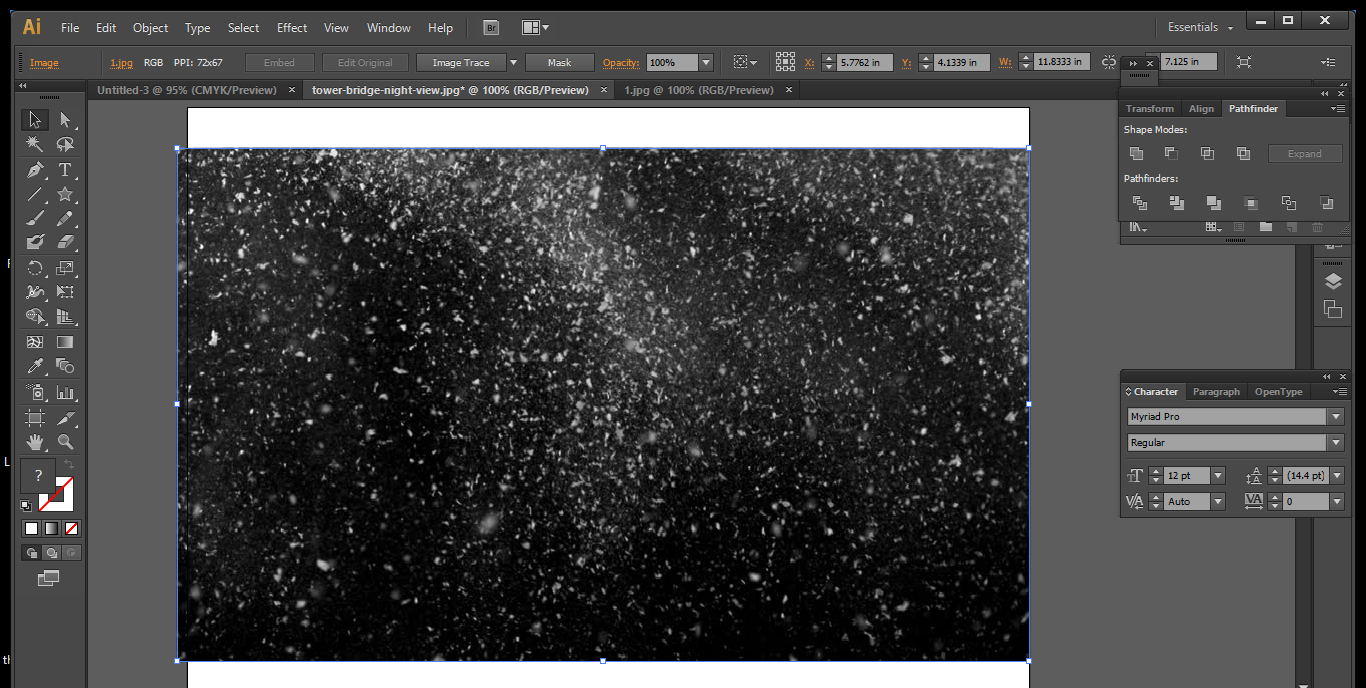
Clipping mask on Illustrator and Photoshop


Illustrator clipping mask


Step 1:  open an image with with we want to mask above 


Step 2:  Open the texture or image what we need to mask or apply on the previous background


Step 3:  place the image on the previous background exact larger then the before on for masking.Though here we apply snow effect so we needed to minimize the opacity of the image to make the snows less highlighted


Step 4:  Both image select with (ctrl + A)  & then right click on the recently placed image to make clipping mask


Step 5:  Suddenly we can see the recent snow image is placed and masked on the previous background


Step 6:  Now if there is a text what should you do ?? Simple as that. Just take a rectangular over the art board & lock it with ( ctrl + 2). Then write text with text tool over the rectangular and transform it larger


Step 7:  Paste any texture on the text and arrange it to send backward for further masking


Step 8:  Select both text and texture with (ctrl + A) and right click over it and make clipping mask


Step 9:  You can see the texture masked on the text so well!!


Photoshop clipping mask


Step 10:  create a new file first


Step 11:  paste a color on the background


Step 12:  write text over the background


Step 13:  Open the texture to mask on the text


Step 14:  Place the texture on sharp to the text border


Step 15:  select both layer on the background and right click on the texture layer to clipping mask


Step 16:    Place the texture correctly to make the masking perfect


On the same way you can clipping mask over the shape as well . first create the shape then place the texture over that & just after click right on the texture layer and select clipping mask to do the masking


Thanks for visiting our blog

You can visit our another BLOG 

How to Create Comic Book Cartoon Effect With Photoshop

January 11, 2018


Movie Effect On a Portrait


We are sharing how to apply a comic effect on a image using Photoshop smart filters


The before after comparison will increase your interest level of this tutorial-


comic-effect-before-after


Now here we starting our tutorial for comic effect on a image-


Step 1: Open image and select quick selection tool

Step 2: Select entire person with quick selection tool and if need subtract with ALT+click to select unwanted area


Step 3: When selection done go to refine edge filer from filter option


Step 4: mask the hair area if need and must select new layer before it done


Step 5: Rename the layer as filter gallery


Step 6: Go to filter > filter gallery


Step 7: After opening filter gallery box select texture – Grain , make intensity-40 and contrast- 50


Step 8: Select filter gallery layer and duplicate as diffuse


Step 9: Go to filter > stylize > Diffuse


Step 10: Make sure to select anisotropic check to soften the edge


Step 11: Again duplicate layer and name it sharpen


Step 12: Move to filter > sharpen > Sharpen more


Step 13: Hide bottom layer though we need to change background


Step 14: Create new adjustment layer as solid color and apply a nice color for the background


Step 15: Drag the solid color layer just under the filter gallery layer


Step 16: Now again select the top layer and duplicate as halftone


Step 17: right click on the layer and select convert to smart object


Step 18: Now we can see a smart object icon layer is visible on the top layer panel


Step 19: Go to Filter > sharpen > sharpen edges


Step 20: Now if you satisfied with the finishing save JPEG format of the image


Thanks for visiting our tutorial

For more photo editing blog go HERE

Layer Mask To Remove A Hair Background by Hair Masking

November 30, 2017


Layer Masking


When we can’t change background with Clipping Path, we can do that with Photoshop masking. 
With Layer and Alpha Mask we can change any hair or woolen background of the photograph


Today we are sharing a tutorial on How to Apply Layer Mask on an Image with Hair 

Comparison outlook will be like this for your interest to enjoy the tutorial-


Here we starting our tutorial steps to do Layer Masking-


Step 1:   Select background and duplicate background layer on background copy of the desired image


Step 2: Take new layer and place it on right under the background copy


Step 3: Select blue color and give it as a background color on layer 1


Step 4: Use pen tool to draw the path of the object with hair surface


Step 5: Select work path on path layer to active the path including ctrl press


Step 6: Copy selected area o layer 2 of the object


Step 7: delete/remove (background copy layer) from the layer panel


Step 8: Take background Eraser tool and change its tolerance level 75% to making the hair outline on layer 2


Step 9: Change brush size based on your need for making it faster and carefully


Step 10: Press CTRL and layer 2 together to activate the object outline and take Doggie tool to retouch the hair surface to improve its natural color level


Step 11: Select layer 1 to adjust Hue/saturation for confirming its masking is done well or not


Step 12: Hide background and layer 1


Step 13: When you confirm transparent background remove (background and layer 1) together to save the transparent background and object on layer 2


Step 14: Remember to delete path layer


Step 15: Save PNG file for the edited image


So now you can easily remove a hair background and place it with another one. For more examples, you can also visit our Site

Follow and learn more about Photoshop services Here

For visit, our previous Blog Click Here


Copyright © Photoshop Photo Editing | Image Retouching | Background Remove | CutOut. Designed by ClickArt Bd