Changing Hair Color
Today we are showing how trouble-free and easy it is to alter hair color in Photoshop by tinting and colorizing any person hair in a portrait. The method we'll learn here gives us whole control over what we're doing, with quite a lot of different ways of fine-tuning the results. We can employ this system on a photo of another person.
The before-after comparison of this tutorial is here for you-
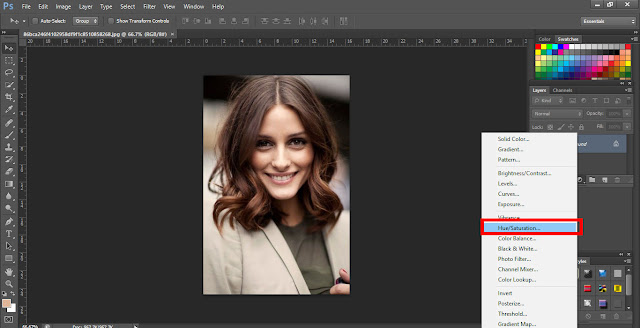
Step 1: Open image in Photoshop and click on the new adjustment layer icon at the bottom of the palette
Step 2: Set Hue/saturation
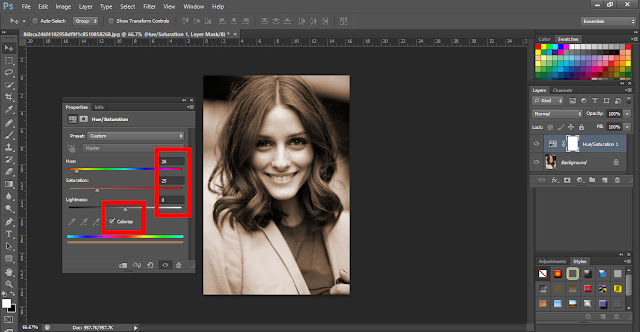
Step 3: After Hue/Saturation dialogue box opens select the colorize option in bottom right corner by click
Step 4: Now change hue/saturation slider to colorize the entire image.Don't worry we will fix the rest of the image later.
Step 5: To hide the surface of color hue/saturation adjustment layer by fill layer mask with black. We can notice currently black is our background color and layer mask is already selected. Confirm foreground color white and background color black. Now press ctrl+backspace to fill the layer mask with black color. After this effect colorizing will disappear from image
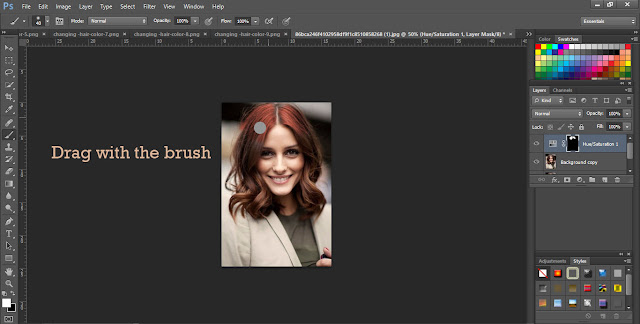
Step 6: Select brush tool and with this, we will paint the hair surface
Step 7: Drag brush tool on the hair area only with the adjustment layer.We can change our brush size also by first and second bracket to perfect painting to the area edge
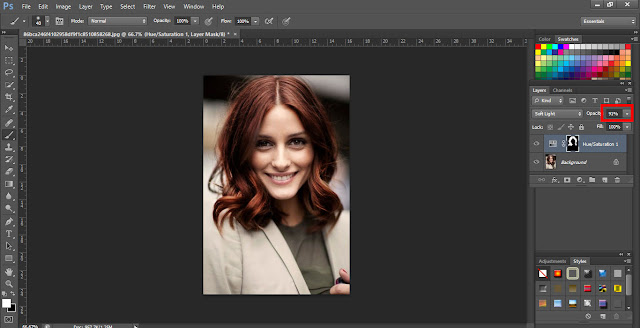
Step 8: Changing the blend mode of adjustment layer is another way to tune the color of the hair
Step 9: Moreover change opacity of the adjustment layer if you still not satisfied enough with the color
Step 10: Save the final output of an edited image and see the difference of original and edited version of the portrait
Thanks for viewing our Blog
If you miss our previous blog go HERE


Post a Comment