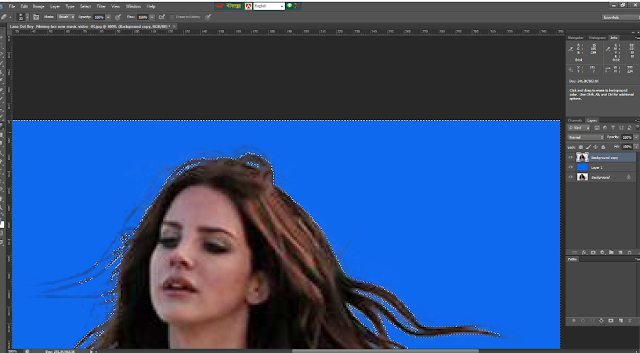
Layer Masking
A layer mask is great Photoshop retouching procedure to remove the background from hair or wool related photographs. It becomes very tricky to detach; when there is a hair related photo and background of photograph both have exact same color. Layer maskings are used to redefine background transparency levels in shades of white, gray or black. These can be done for either a specific group of layers.That’s why it becomes necessary to use Eraser & background Eraser tool to create transparent background of the image and easily replace with another background
We can edit any background by easy removing process which we called photo masking.In photo masking, we can differentiate 3 masking
- layer masking
- Channel masking
- Alpha masking
If we understand layer masking well we can identify easily the overview of channel masking. Because both are using for the same purpose but in a different way.
we can initialize the difference between the normal photo and layer masking photo to comparing
So we need some photoshop tools to execute the editing successfully
Steps of layer mask
Step 1: First we need to open the desired image and then copy background layer
Step 2: Select background layer and press new layer icon on right under the layer panel to changing its layer color
Step 3: Go to background copy layer and take background Eraser tool to mask the area of hair surface slowly. But the time we did mask we have to adjust tolerance percentage to adjust masking with hair color. We can increase/decrease masking tolerance based on our satisfaction
Step 4: Take Lasso tool to draw a path around the object
Step 5: Select background copy layer and press Ctrl to select the path
Step 6: Then press (Ctrl+U) to inverse the area of the object & press backspace to remove the unwanted background color
Step 7: Now to remove unnecessary spots around the object selected area press Ctrl and select
background copy layer together to pick the outline of the object
Step 8: Press inverse (Ctrl+U) to active the outside area of the object and delete extra spot and sheds
Step 9: Select layer 1 to go Hue/Saturation (image > image adjustment > Hue/saturation) to check if masking is perfect or not by changing its color multiple times
Step 10: Zoom the image to check hair surface that how masking has done
Step 11: Open one of background image from outside and copy to work with it
Step 12: Go to edit page, select background layer and paste that outside background image
Step 13: Now we can see there is another background which is pasted successfully and removed the previous background
Step 14: Merge the entire layer together pressing (Ctrl+E) and save the JPEG format to save the final edited photograph,
we will give you another idea of Chanel masking on an image to change a background
Feel free to ask questions if you feel you have necessary inquiries regarding this Blog To know more about photo editing services you can visit our another Blog
Thanks for visiting


Great blog, I love this blog because of many good reasons. Get Best Background Remove Service within your affordable price.
ReplyDelete