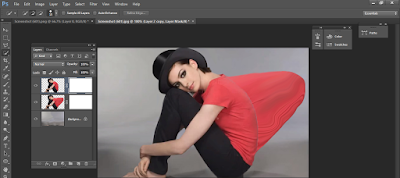
The dispersion effect
The Photoshop dispersion effect, splatter effect, shatter effect, whatever you desire to describe it is a very popular method to employ on photographs, particularly those with movement.
Since this is such a popular technique, I figured I would take a stab at a tutorial, doing it my way. So here is a very easy way of receiving this effect.
I prefer simple because the mechanics are really not that hard. Choose the finest brushes and where to use them does take a bit of perform to get decent results. So if you don’t find a good result the first time, don’t worry, just keep trying.
Here we are starting our tutorial-
Step 1: Open the image and select outside with polygon lasso tool
Step 2: Press (cntrl+j) for duplicate layer
Step 3: Again select background layer and select outside layer with polygonal lasso tool
Step 4: Hide copy layer and selecting background layer to (fill > content aware > OK) to delete the object
Step 5: Select layer 1 and select the object with quick selection tool
Step 6: Selection tool need to copy with (ctrl+j) to duplicate in layer 2
Step 7: delete layer 1 after duplicate previous layer
Step 8: Duplicate layer 2 in a new layer layer 2 copy
Step 9: Select layer 2 goes to filter > liquefy
Step 10: On layer 2, add layer mask and layer 2 copies > add layer mask
Step 11: Select layer 2 and layer mask and (ctrl+i ) for black color
Step 12: (Select layer 2 copy layer mask) and mask it with desirable brush
Step 13: Draw the pattern with brush you want create
Step 14: Select layer 2 layer mask and mask with white brush to make the pattern more you need
This is how we can apply dispersion effect with Photoshop
Thanks for visiting our Tutorial
You can visit our another BLOG about Photoshop services


Post a Comment